Monday, October 31, 2011

Tool Time

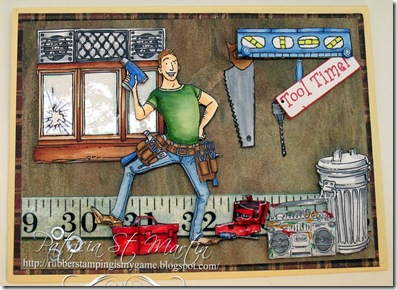
Tool time

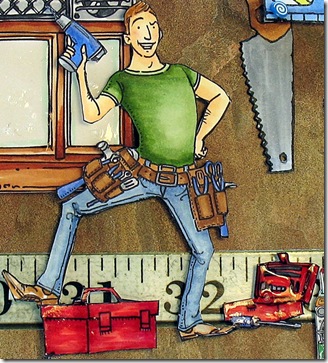
We have started Challenge #30 at Color Me Creative and it is all about Boys, Men anything that is on the masculine side. Challenge ends Nov 11th 8:00pm All you need to do is color your image with copic markers. I used from Mo’s images and it is called Mr Fixit. I also used some from Make it Crafty Called Trash Can, Soundblaster from Elements and Smashed Factory Window from Factory Elements. Some of the tools and sentiment are from a stamp set I had from The Angel Company. He is colored with copic markers.

Tool time guy

Our Wonderful sponsor for this challenge is  Mo’s Digital Pencil stamps

mos ad1

The Prize for the winner of this challenge (randomly chosen) will get:


**Prize from our sponsor Mo's Digital Pencil is a $15 Gift Certificate to spend at her store!!

**1 pack of Cryogen Cardstock
Thanks for stopping by. Have a great week.

Hugs, Patricia

Saturday, October 29, 2011

Halloween Treats and Christmas Ornaments

Halloween Treats 2011
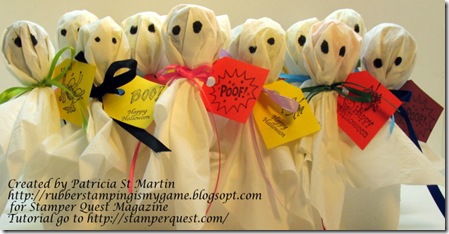
I wanted to share this with everyone. This is something I do for all the little Witches and Goblins that come to my door every Halloween, they are easy to make and it is fun to see the little ones faces when they the little ghosts and they get to choose the one they want. So I have a tutorial on how to make these so just go by The Stampers Quest Magazine and I have all the directions on How to make these.
15-300x217
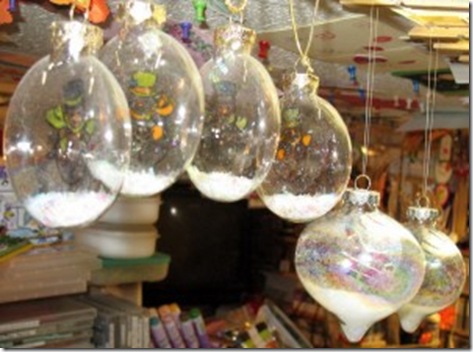
These Christmas Ornaments also are so easy to make and if you would like to know how to make these I have another tutorial on The Stampers Quest Magazine and you will be surprised how easy these are.  I hope you stop by.
Thanks for stopping have a great week end.
Hugs, Patricia

Friday, October 28, 2011

Holiday Card and Gift Box

IMG_7614

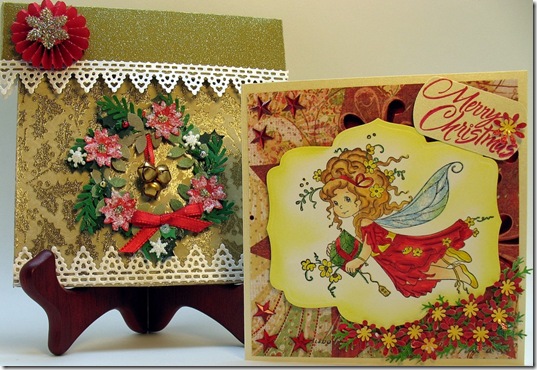
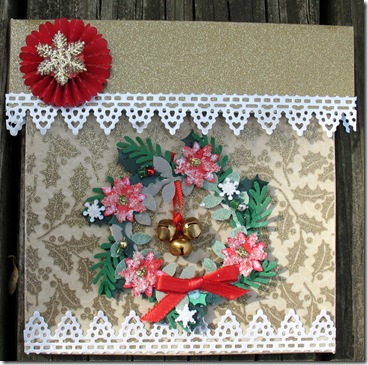
I hope you will enjoy my tutorial on how to make the gift box for your card. Once I figured out the sizes. It is so easy to make, and it give such a nice presentation to your card. So for all my friends and the professional people I always give a Christmas card to I’m going to make a box to give them their Christmas card in.

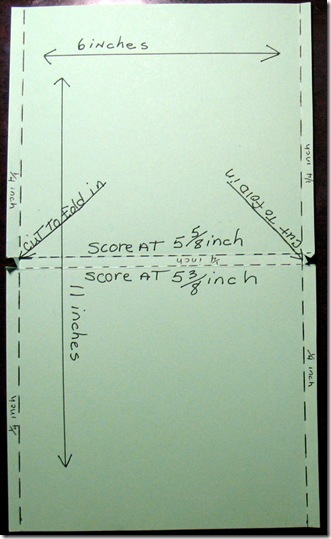
I used heavy card stock for the box
BOTTOM
Cut 1 piece 6 inches x 11 inches
Score on each side 1/4 inch (Vertical)
Turn cardstock (Horizontal)
Score 5 3/4 inch and 5 5/8 inch
That will give you 1/4 inch at the bottom of the box
TOP
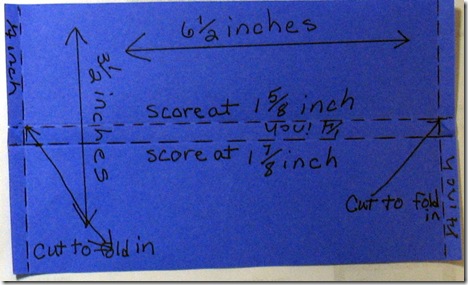
Cut 1 piece 6 1/2 inches x 3 1/2 inches
Score 1/4 inch on each side (Vertical)
Turn your cardstock (Horizontal)
Score 1 5/8 inch x 1 7/8 inch
That will give you the 1/4 inch for the top of the box
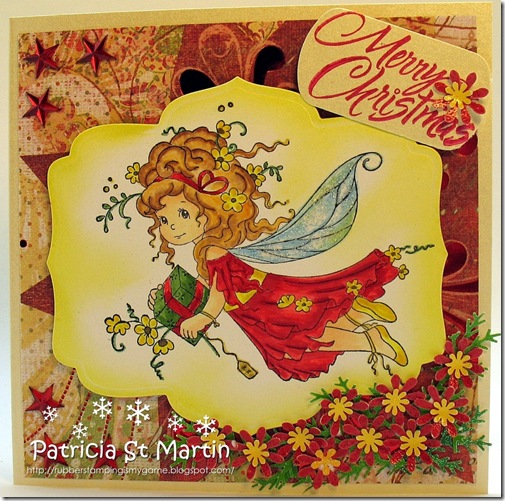
Card size  is 5 x 5

Directions Once everything is cut, scored and folded you need to glue or tape (USING A VERY STRONG ADHESIVE) Make sure you only glue the SIDES of the bottom and the SIDES of the top so you can add your card inside the bottom. You can decorate your box any way you want too as it can be used for any kind of Holiday. When you are putting
the box and the top together where it gives you the 1/4 inch you need to cut into the scored 1/4 inch line so the edges fold in.


Gift box card holder

SUPPLIES:
Punches:
Key tag Stampin’ up
Holly, Fern, 5 petal mini, small flower, Punch a Bunch
Frond leaf Martha Stewart
Labels 5 Spellbinders
Rosette Tim Holtz Alterations die strip
Lace light Deco Border Cherry Lynn designs
PAPER:
Holiday Wonderland EK Success
Cryogen
Pearl Ivory card stock
INK:
Copic Markers
Tuxedo black Memento ink
Blazing Red Sta-Zon ink
Yellow Brilliance ink
STAMPS:
Merry Christmas Hero Arts
Precious Present by Sylvia Zet
OTHERS:
Ribbon grosgrain
Bells
Flake Snow

This is the bottom. I do hope you understand this.

box bottom

This is the top. I do hope you understand this.

for top

I do hope these help a little.

Card with box card 2011

I do hope you enjoyed my tutorial. I also hope you give it a try, if you do please let me know I would love to see what you do.

Thanks for stopping and I hope everyone has a super week end.

Hugs, Patricia

Monday, October 24, 2011

Let it Snow


Let it snow

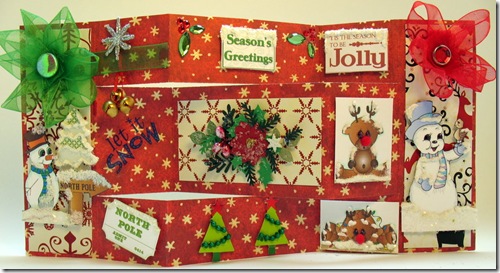
Our Cards For Men Challenge #22 is all about Animals. So as you can see I had a hard time choosing my images. Over at Digital Delight as they are our sponsor for this challenge have so many wonderful images and I wanted to make a Christmas card. So the images I used are Jingles the snowman, Snowball the Snowman, North Pole Sign, Tangled lights reindeer, Tis the season to be jolly sentiment, Tree patterned, Sitting reindeer. The card I made is called a Tri Fold Card and here is the tutorial if you would like to try and make one. The card stock I used is from EK Success called Winter Wonderland. I used Liquid Appliqué White heat set it and added some Diamond dust from Flora Craft to make it sparkle. The gem stones are from The Paper Studio. Organdy ribbon and 2 bards to hold the flowers together. I did use some stickers. I made the Christmas Swag last year and added some jingle bells. 

Start Date:  24 October 2011
End Date:   6 November 2011
Theme:   Animals
Sponsor: Digital Delights
website:  http://digitaldelightsbyloubyloo.com/
Logo:

Blurb:

Welcome to Digital Delights, a magical place filled with my little digi creations from all walks of life. We have a wide range of digital stamps which are delivered straight to your email 24/7!!

http://digitaldelightsbyloubyloo.com/

Thanks for stopping by and I do hope you enjoyed my card. Sorry I have not been around but it has been a busy couple of week for me my brother and my sister in law from Texas have been visiting and it has been so wonderful to see them. Only thing is I do think it was a little COLD for them here in Wisconsin. Next time they should come maybe in September or the first part of October when the leaves first start to change color.

Hugs, Patricia

Monday, October 17, 2011

Happy Halloween

Happy Halloween

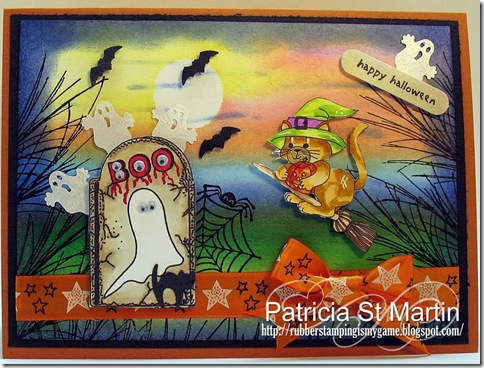
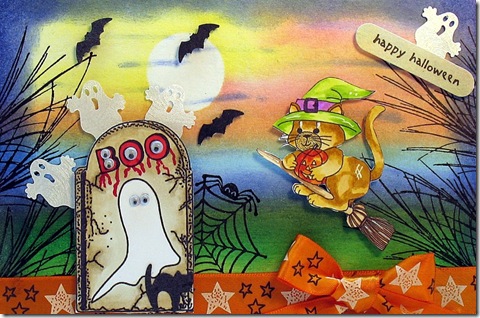
We are ready for our Challenge at Color Me Creative. It would me nice if you could join us. We are doing Challenge #29 and it is all about Halloween Fun or Fall Fun Coloring.  These are some of the cutest images I have worked with this year the images are called “Boo Tomb Stone” and “Cat on a Broom”. Our sponsor for this challenge is Glitterbabe you can win a $10.00 gift certificate for the shop and pick out what ever images you want and also 1 pack of Cryogan card stock. The challenge ends October 29th.


color me creative classroom logo1

Color Me Creative -SCSBanner

Want to learn how to master, use and love copic markers.
Suzanne has classes on the road.
BEGINNER/INTERMEDIATE CLASSES
ADVANCE CLASSES
CLASS INFORMATION CLICK HERE.
SHE MIGHT HAVE CLASSES IN YOUR AREA.

Happy Halloween close up

Here is a close up. Matte cardstock 6 1/2 x 4 1/2.  Brilliance inks, sponges and started with Mediterranean Blue going side to side next adding Sky Blue, Ivy, Olive,  Gramma Green, softly adding Orange, Yellow, Coral and finished it off with more of the Mediterranean Blue on the edges. Stamped a Fern stamp from Great Impression on the edges. The sentiment is from The Angel Company and punched it out with Stampin’ up’s word punch. My little ghosts are stamped out with an unknown punch. Bats are punched out with Martha Stewards border punch. For the moon I punch out a 1” circle with Stampin’up punch. Copic markers I used are R24, R29, V09, V05, V04,YR24, YR21, YR20, E43, E42, E40, YG25, YG23, YG21, YR09, YR04, YR31, E23, E21.

Thanks for stopping by and I hope you like my card. Have a great week.

Hugs, Patricia  


Wednesday, October 5, 2011

He love me He love me not

He love me He love me not

Over at Stamper Quest I did a tutorial on How to make this Magic Card so if you would like to see how to do it you will have to go to Stamper Quest Monochromatic Magic: Pat’s View  an see how it is done. If you like it they have a printer friendly button and you can print the instruction out. If you try and make one and if you have any questions just let me know and I will help you. I also did a Origami Diamond Fold Card over at Stamper Quest and the instructions on how to make that card are their also.

Thanks for stopping by and I do hope you like my card. It was a lot of fun to make.

Hugs, Patricia

Sunday, October 2, 2011

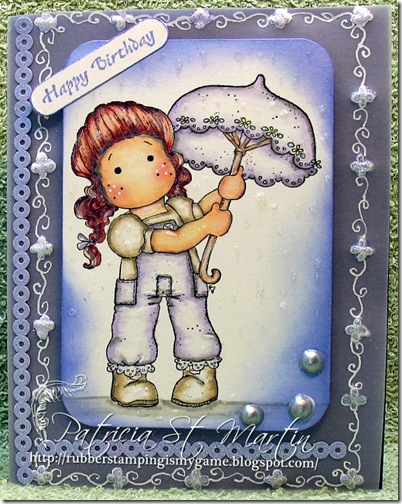
Tilda Under her Umbrella

 Tilda under her Umbrella Card size 5.5x4.25

At Color Me Creative Challenge #28 is Coloring with Copic Markers and having your card look Vintage or making you image look Distressed. Susanne has done several video’s to help everyone understand this technique. I had to watch them and I’m not sure it I have got the technique right. I do want to leave the links here because if you want to try this all you will need is click here and you can view how to do this.

http://www.youtube.com/watch?v=g_C1ubwFwjI  This is Video #1

http://www.youtube.com/watch?v=03FIn8DLXEE&feature=related  Video #2

http://www.youtube.com/watch?v=XQBYsyV4HT4&feature=related  Video #3

http://www.youtube.com/watch?v=HpqLlkiRipk&feature=related  Video #4

If you give it a try I would love to see how your card turns out. So come back and let me know. I will stop by. I do love comments. Then you can enter your card in the challenge at Color Me Creative. The challenge ends October 14, 2011 so you have time. The prizes for this challenge are:

** 3 Magnolia Stamps of their choice from Magnolia-licious

***1 pack of Cryogen Cardstock
color me creative classroom logo1


Copic Markers I used are:Skin E11, E00, E50. Blouse and Shoes E42, E41. Handel on the Umbrella E31, E30. Hair E19, E18, E08, E02. Pants and Umbrella BV00, BV000, BV0000.  On the Umbrella I also used a little G00, Y00 and to give the darker lines or the distressed look I used W3. I sponged around Tilda  with Brilliance ink Lavender. I used some Diamond Glaze and added a touch of Deco Art Glamour Dust to give some sparkle to look like rain drops. Corner rounder from Making Memories. Stampin’ up Word Window punch for the sentiment. Three Silver dots I made from The Pearl Pen.

The paper I have in the background is called Parchment Paper. This is what is called a Parchment Craft. I had followed a pattern, you put your parchment paper over the pattern and I traced the flowers with white ink by keeping the pen in an up the upright position to keep the lines as fine as possible. Then you turn over the paper and place it on the soft side of a embossing pad. Very carefully go over the flowers petals and embossing all the flowers. I did add some Stickles Star Dust to give my flowers some sparkle. When you do the entire card it is just stunning.

Thanks for stopping by. I always love comments. Let me know what you think, I love hearing from you.