Friday, May 28, 2010

Here it is; Tutorial How to make a TENT CARD.

(9)My Truck

This is an images from Fred she said. They have wonderful images. Although I say that about everyone but they do. This images is called "my truck".

Things that you will need to make your card.

1-12"x12" or 2-8 1/2" x 11" sheet heavy weight. Something to cut out the center of your card. Strong tape, scor-pal, paper cuter, lobster claws and rings I used size 7, I found these in the jewelry department. 1/8" hole punch. Then what ever embellishments and different papers you want to add to your card.(1)cut 2 6x6 and 1 4x6

You need to cut 2-6" by 6"of card stock and 1-4" by 6". This can be created to any size you like.(2)scor pal 4x6

Score the 4"x 6" piece every 1"down the long side. This will create the bottom of the card. Fold in the mountain, valley, mountain, valley.

At this time if you are going to add a designed paper to the front of your card. I would glue it to the front. Remember when you cut out the front panel you are cutting though two pieces of paper, you want it to be centered and leave enough on the top and the bottom. Make sure whatever size you want to cut out in the front is a little bigger then the image you will be putting or hanging in the middle. You do not want to cut to close to the bottom so that when you put your card together you will see the folded piece on the bottom and you want to leave enough space on top so you can hang your image. (3)cut out middle

(4) tent card

After all that is done attach the smaller folded piece to the front and the back making sure it all aligns. You can glue or use a good tape so it will hold together. I hope you card looks like this.(6)punch holds

I punched two holes because my oval is a little long and I wanted it to balance. If I was hanging it long ways I would of used one and centered it. I put my rings in the card and my lobster claws in the oval (if you wanted you could used just rings).(5)image ready

So it looks like this and you can see I have a little space between my card and the oval. Behind the oval that is my friend Chris she is trying to stay out of the picture she has a lavender shirt on.(7)Tent card from side

All you have to do is add some glue or good tape to the top of the card and it is all done.(8)Tent card 1

I was at my friends house when I did this so I needed to go home and add some embellishments to it. CONGRATULATIONS You have made you first Tent Card. I sure hope you understand this, if not let me know if you have any questions and I will get back to you.

Remember if you go down a little to Me and my Grandpa, I made another tent card. You can check that one out also.

challenges

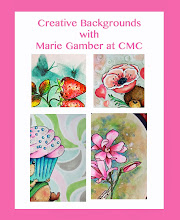
crazy 4 challenges- tent card

Love,

Patricia

Tuesday, May 25, 2010

Hopes and Dreams begin here......

Hopes and dreams start

Two weeks have passed already and it is time now for our Challenge for Cards for Men to begin. We have The Stamping Boutique as our sponsor. This challenge ends June 6th. The theme is "Good Luck". You need to enter your card at "Card for Men". You can click here and it will take you to there blog. I have here two of there images one is AJ graduates and the other one is Audrey graduates. They look so much like twins. If you would like to see some more of Tracey images you can click here and it will take you to her store.

Our company, "The Stamping Boutique" is dedicated to quality products and original artwork. Our designers are chosen for their character and personality,as well as, their beautiful designs. We work hard to give you our very best. Thank you so much for having us as your sponsor this week.

Tracey-ButtonA

The sentiment stamp is from Creative Vision Stamps. Ribbon is from JoAnn's, That was a wonderful find for 50 cents yard and I love the butterflies and the flowers. Added some large yellow buttons. Punches Martha Stewarts was for the background paper, Marvy Uchida scalloped square for the sentiment , EK punch was used for the words good luck. I used one of the Nestabilities for AJ and Audrey. One of my Sizzix dies for the Mortarbord and tassel.

hopes and dreams start side

As far as the coloring I used my copic markers and my At you Spica. These are the colors I used.copic hopes and dreams At you Spica hope and dreams

hopes and dreams start right

For the sentiment and the kids is Brilliance Ink Beige and it is just sponged around the edges, working from off the paper in a circular motion. I do hope that you enjoy my card. Just a note I know SEVERAL OF YOU WANTED THE INSTRUCTIONS FOR THE TENT CARD. I WILL GET A SMALL TUTORIAL DONE ON HOW TO MAKE THE TENT CARD FOR THAT CARD FOR YOU AND HAVE IT POSTED. I HAVE NOT FORGOTTEN.

Challenges

Cards for Men- Good Luck

Monday, May 17, 2010

Me and my little Brother

Me and my brother

Another image I just love. It is from Prairie Fairy. She really has some wonderful images if you would like to see some of her images you can click here and it will bring you right to her store and she is having a sale on them right now so it would be a good time to stop by. I'm sorry I did not write down the colors I used. I did color with copic markers. On the corners I used a corner punch from Carl Carls Craft. The other punch for the greenery was Martha Steward punch. The layered flowers are from Color Bok and I used Stickles glitter glue in the middle of the flowers color Cinnamon and I also put some Star Dust Stickles on the edge of the flowers.me and my brother side

Here is a side view of the card. I did layer the framed card with the foam dots. From Color Bok pink Metal dots on the bottom left side and the upper right side. I do not know if you have notice but not very often do I put words on the outside of my cards and the reason for that is when I need a card for something I can always put the words on it when I need it. This way certain cards are not tied down to only be, for say a Birthday card. Like this one I can use it for several occasions like Thinking of you, Remember when, Memories, Missing You. I'm sure I can think of more. That might be something you might want to think about also. I hope you enjoyed my card. I hope everyone has a wonderful week. I know the weather here is going to be nice. Today not to nice but tomorrow it is going to start to warm up.

challenges

Prairie Fairy- Flowers all around

365 days- Best Friends

Sunday, May 16, 2010

One more thing.. Meet Sophie

My name is Sophie as of Wednesday May 12, 2010 I became a member of the St Martin Family. I'm 8 weeks old, and by the name you can tell I'm a little girl. I belong to Kurt, Jessica, Aiden and Emma St Martin and my Grandma is telling you about me. I know she really likes me. My mom is a Chihuahua and my dad is Maltese. So I'm a mutt. I'm a cute mutt and everyone love me.

Best Buds


Ive_been_pubbed

Can you remember a time in your life, having a day like this? I can.. Did you have a dog, even a Cat or a Kitten you loved very much, sitting outside with it and just hanging out. This is one of Mo Manning images it is called little boy and dog.Ive_been_pubbed

I colored the image with copic markers. The color I used are E000, E00,E01,E02,E11,E13,B91,B93,B95,R21, R29,YG91,YG93,YG95,YG97. The grass was done with copic, I did use the copic MultiLiner sp 0.3 color green to add some small lines that would look like grass. The sky I did with sponges. Start from off the paper (always rub some on your paper that is your scrap paper before you go onto the card) and go from side to side. I always start with my bottom color and work up blending in the other colors. Brilliance Ink colors orange, yellow and sky blue. I did mask around the boys head. I love using Brilliance ink, Distress ink and Marvy Matchable inks for doing this.

Ive_been_pubbed

I added a couple stickers with words. The baseballs and baseball hat are stickers also. The bat is a button, tired some Scrapper's floss color red on the button. The stamp with the birds is from Stampscapes.Ive_been_pubbed

Here is a real close up of the front of the card. So you can see everything.

I'm taking copic classes from Suzanne Dean, she is a wonderful teacher and a really nice person. She is have a contest going on right now, so I entered my card into her contest today. Summer time theme. Three lucky winners. It ends May 31.

If anyone is interested in taking some copic classes and would like to check it out you and go here and shee what Suzanne Dean is offering. If you do let her know you learned about it from me.

Challenges

Cuttlebug- For kids at heart.

Our Creative Corner- Lets here it for the boys.

ABC Challenge- U for Unused Stash

We are having a Design Team Call at Cards for Men...

I've decided to start a fortnightly challenge here on Donnas Den of Crafts and am looking for a handful of you out there to join the design team. All members will need to be able to make one card fortnightly for the regular challenge and to comment on the entrants as much as possible. You will also need to publicise the challenges that Donna's Den sponsors which is approximately one a month (but sometimes they're like buses!).
Anyone interested should leave a link to their card(s) in the comments below before mignight BST (British Summer Time) on 28th May 2010. I will contact/announce the winners by 31st May 2010 and the first challenge will be on 14th June 2010.
Good luck.

That is what Donna has posted on her blog and you would go here to post your card or cards and let Donna know if you are interested.

Good luck everyone, we are a great bunch of ladies. Donna is wonderful person to work with.

Thursday, May 13, 2010

Summer Time, Yes it is almost here......

Summer Time

I do feel better when I do things I'm comfortable with and copic markers are what I'm comfortable with. It is fun to do something different once an awhile but when a person not happy with it, it is not fun. This is one of Mo Manning digis. I love her images they are all wonderful.summer time left side I added some buttons as little toys around the baby, just cut the backs off and ground then down tell there smooth and used glue dots to hold then on.summer time right side

Used Diamond Glaze from Judi Kins to give the look of water in the pool. Some summer color for ribbon. Summer time just front

Here is a real close up of the front of the card so you can see the coloring. It was an easy card to do. I just love it. I sure hope you enjoy this one. That baby is so cute.

Challenges:

Mo Manning- water

Cards for Men- Outdoors

Shellys Images- Anything

My time to Carft- cute

Inky Impressions- Summer time

Crazy for Challenge- Boy Card

Crafty Ann- Challenge #14 anything

Dare U to Digi- Anything

Working with Some Water Color

Hydrangea done in water color

Something I have not done in a long time is working with my water colors. I'm sorry to say I sure could tell. Thought I would try something different. I just love this Hydrangea stamp. Sad thing is I can not even tell you who the stamp is made by because I took it off the wood a long time ago. I add glitter and it is ok.Hummer and Petunia

I have now idea what I was trying to do here. The water color turned out just fine and I'm thinking lets add glitter. I sure do think I add to much. What you think? Flowers are fine but the leaves are not. Poor hummer he did look just fine, he's not to bad but he did look better. So now I can not leave the day go on like this so I have to do what I do best. So I will be back.

Challenge

Paper taker Weekly- Something sparkly

For Fun Challenges- Use a real rubber stamp

Tuesday, May 4, 2010

And here's Chirpy

chippie all by himself

Chirpy is a real cutie pie.. He is so much fun. So easy to work with and you can have him or put him into anything. Here he is just showing off standing by all those pretty flowers. I wanted to leave him open with no saying because I can use him for pretty anything. He is one of Sunshine images if you would like to see more of Sunshine images you can click here. and we had a challenge at Crafters Delight, it is our first challenge there and the challenge was "Be kind to animals". Purples, lavenders are some of my favorite colors and that is even hard to say that because I love all colors. I used some designer paper, ribbon, styrofoam fluff, flowers that where already made and added some greenery behind then. Not like taking the easy way out. Added some of the teal color dots.my bird house

So then I had to make something but not a card. So this is what I came up with, with the help of my girlfriend Lee. She thought about the bird house. We made a template and put our heard together and this is what we came up with. I do want to thank my friend Lee for all the help she gave me in creating this little bird house. We had a lot of fun, we always do. You never know what happens when we get together. So her is Chirpy in his little "Home Tweet Home". We used several of Martha Steward punches to create the roof and used distress ink on the edges of the top roof and around the house edges so it looked a little old not so new. Three little butterflies with really small pearls on each of then. I punched out some greenery for around his house. I think Chirpy will be happy there.

Challenges

SophistiCat- challenge #30 card for a child

Creative Craft- Bloomin Marvellous

Flutter by- challenge have a butterfly on your card

Come play with me.....

IMG_2962-1

This is a card I did for Card For Men challenge back in March and for some reason in my life things were a really crazy at that time and I never got to put it on my blog. So I was thinking now would be a good time with summer coming. This one of Prairie Fairy images she has a lot of fun images and I thought this was one of then. I love her new bears and her fairy's are adorable. If you would like to go over and see some of her things just click here. I colored the images with copic markers and used a template to create the water and the sky. No embellishments this time. I feel like I'm missing something. Well enjoy.

Challenge

Prairie Fairy week 17 going digital blog hop- anything goes

Incy Wincy- anything goes

Kaboodle Doodles- something that say spring to you